On this page we will guide you step by step through the installation of MySQL Server. It may seem a lot and complicated, but if you do everything carefully you can finish this installation within ten minutes.
The installation of MySQL starts with the following welcome screen:

Click "Next" and the installation will really begin! It is not difficult, for example you have to click "Next" 15 times and "Finish" 2 times. That will work, right?
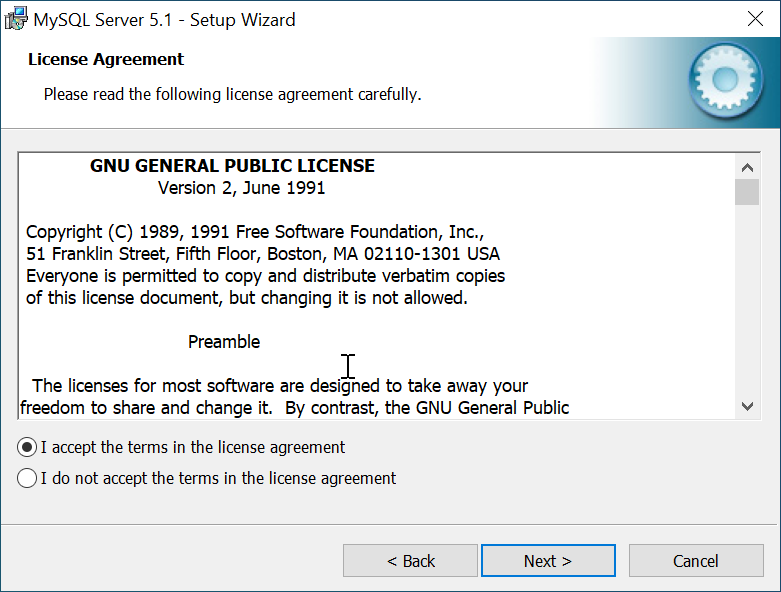
Click on "I accept bla bla" to accept the license terms and click "Next".
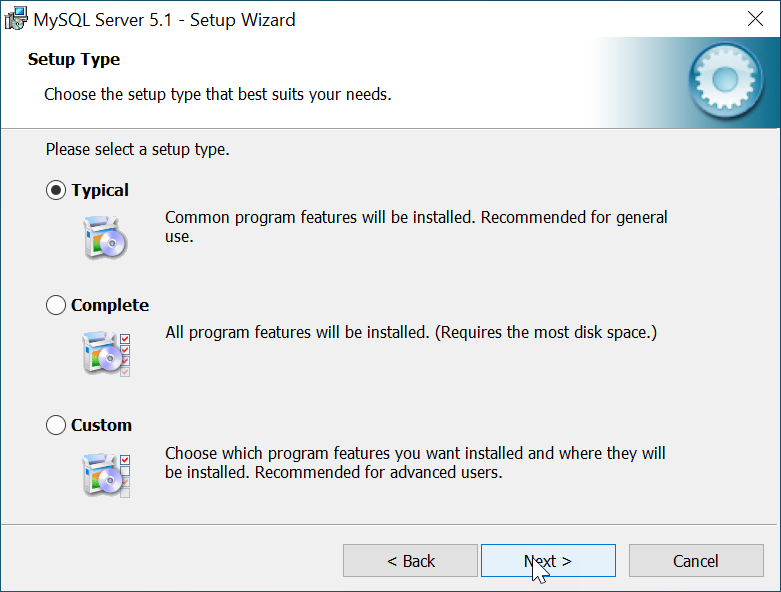
MySQL can be installed in three ways. In this case we choose "Typical", because this gives us the most setting options. Then click on "Next".
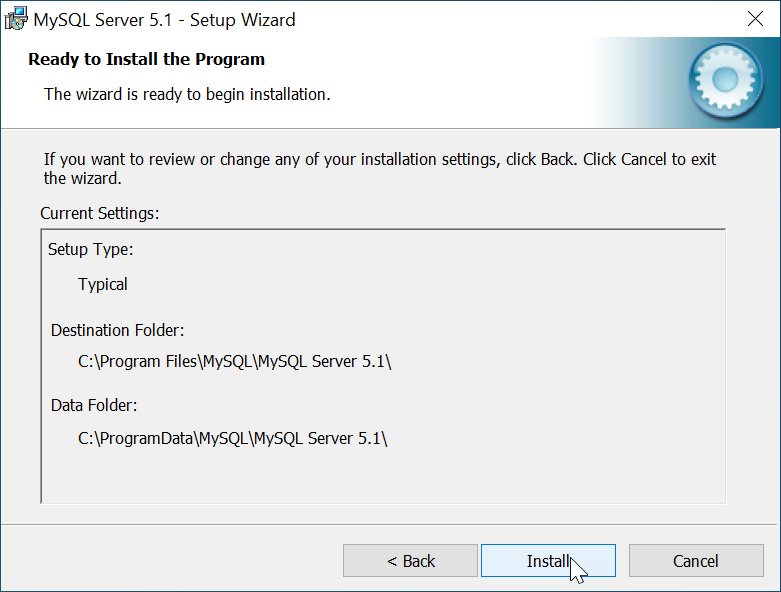
These settings are fine. Click "Install" to continue the installation.
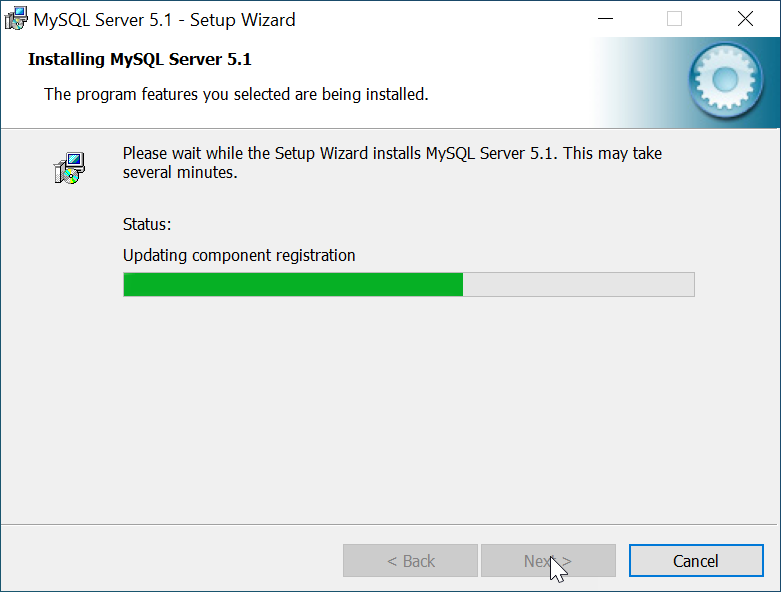
The installation is running and it usually goes pretty quickly. You don't have to do anything except wait.
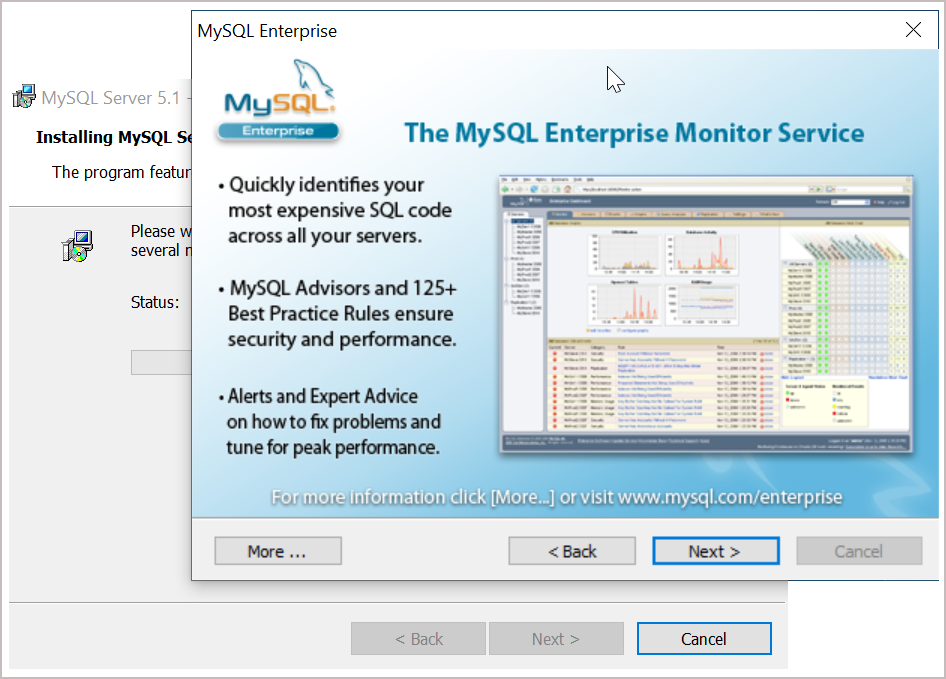
Next comes a disguised advertisement for MySQL Enterprise.

We don't need all this, so click on "Next" in the top screen for another promotion of MySQL.
We don't need this either. Therefore click again on "Next", after which the following screen will appear:

OK, the database server is now installed on your computer. That's coming along nicely. Now it still has to get the correct settings, so that you can get started with MusicManager. Therefore click on "Finish" to start the configuration program. This section also has a welcome screen:

Click on "Next" to continue. It is not clear whether the screen below always appears, but it does appear with us in any case, because we have already installed MySQL on our computers before. If it doesn't appear, skip this step and go to the next image.
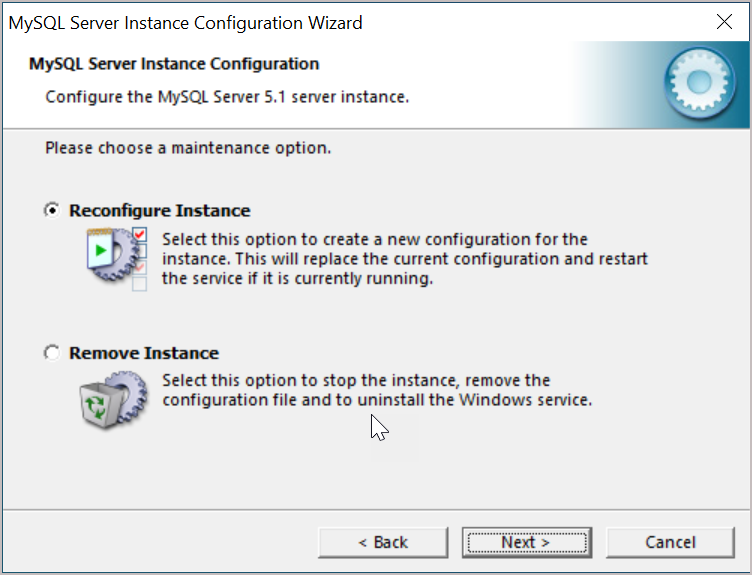
Click on "Next".
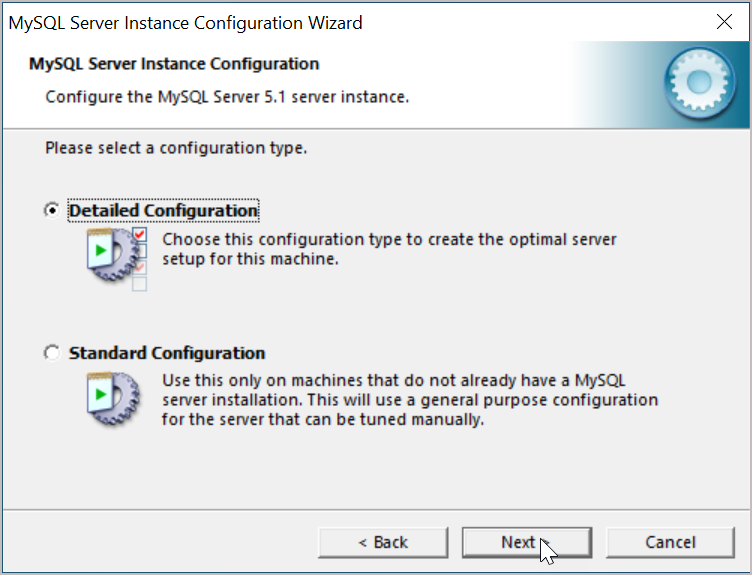
We choose the "Detailed Configuration" to avoid having to manually change the MySQL "my.ini" configuration file later. We let this wizard do the work as much as possible. Then click on "Next".
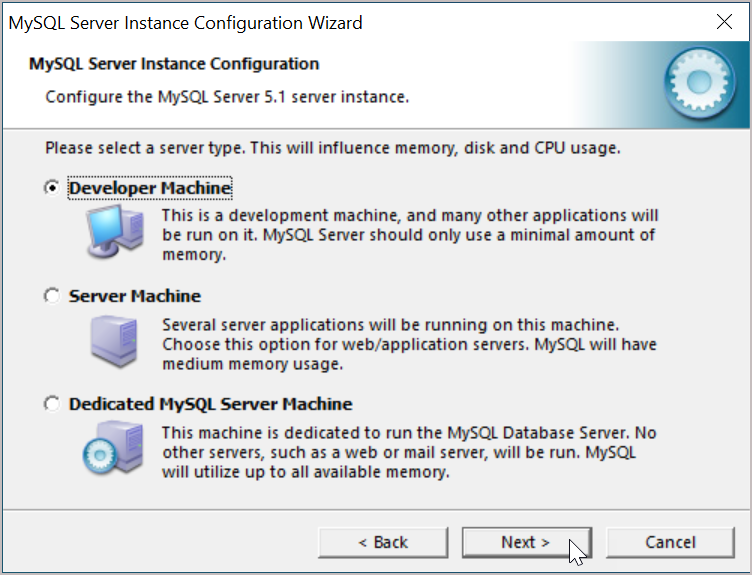
Choose "Developer Machine". Not because we are all "developers", but because this is a very light load for your computer and this is already enough for MusicManager. Then click on "Next".
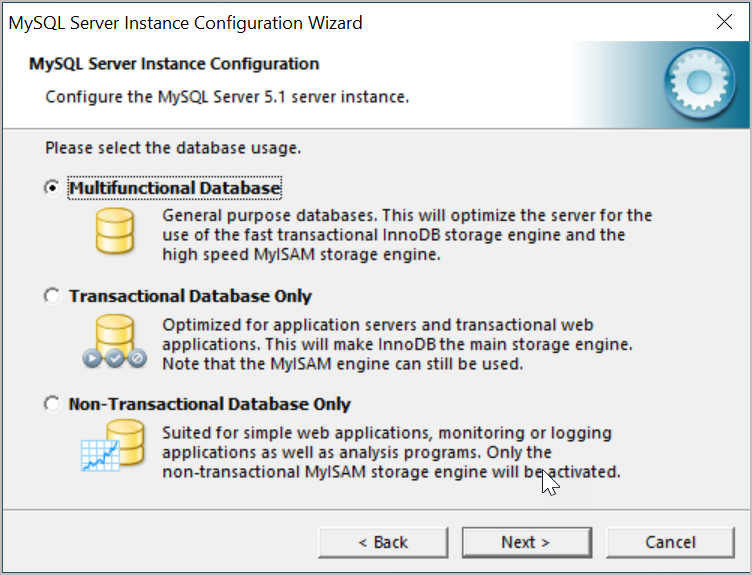
We choose the "Multifunctional Database", which is already selected by default, and click on "Next". The wizard will now modify the already installed MySQL Server.
It gets monotonous, but click "Next" again.
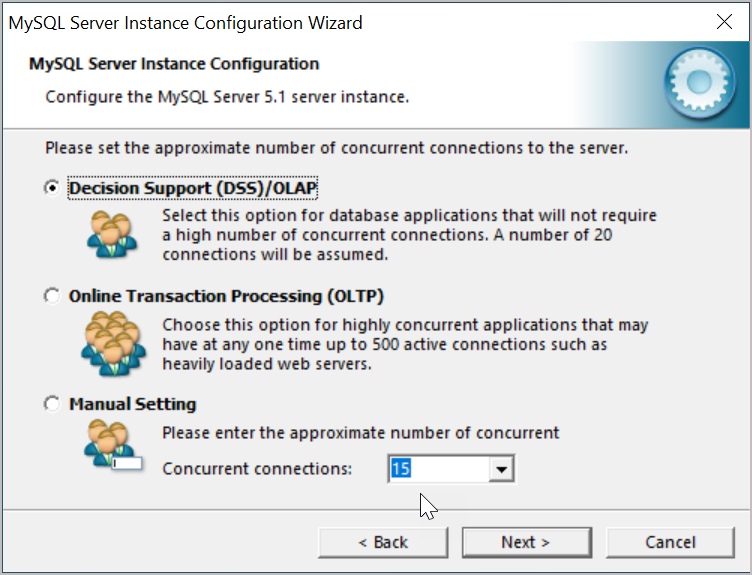
We choose once again for the default setting, ie "Decision Support (DSS)/OLAP". This is for up to 20 simultaneous database connections. MusicManager© works completely without permanent database connections, so this number is more than enough. Click on "Next".
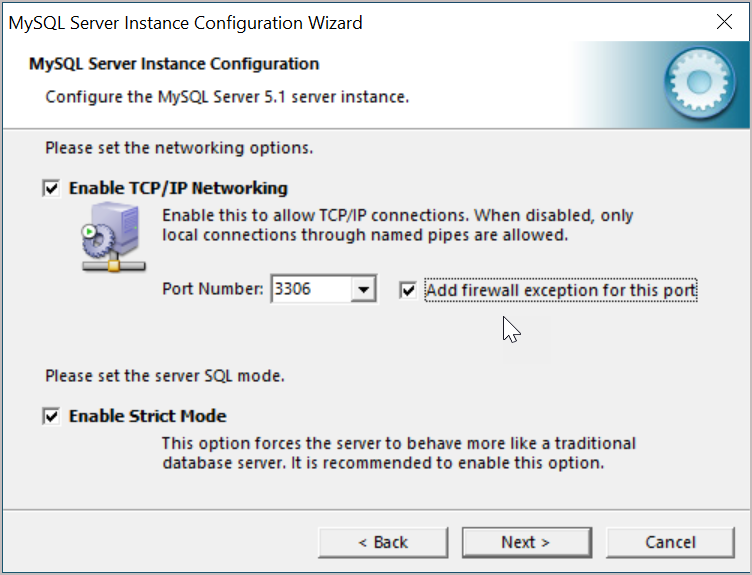
In this screen, two ticks are already set by default, namely at "Enable TCP/IP Networking" and at "Enable Strict Mode". To be on the safe side, also check the box "Add firewall exception fort his port", so that MySQL can also be accessed via a firewall on port 3306. This is the default port number and when using one MySQL server we leave this stand like this. Click on "Next".
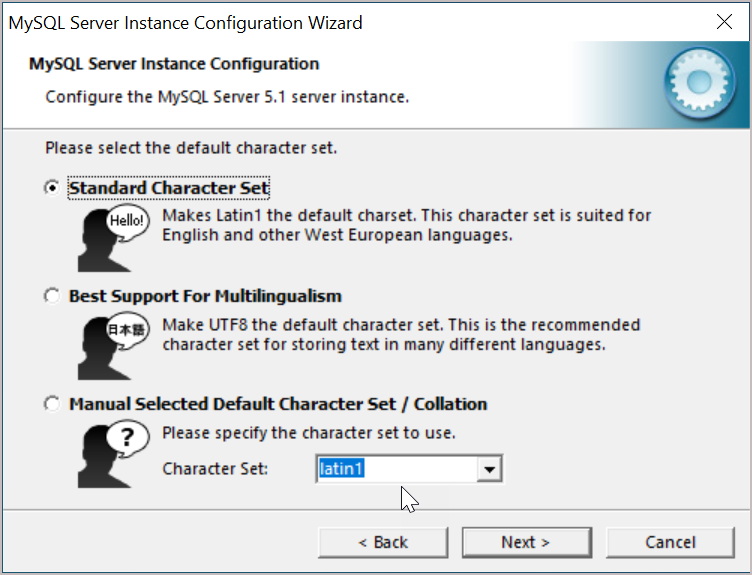
We choose the "Standard Character Set", unless you have a reason to choose a different character set, for example for a completely different language such as Dutch or English. The point is that MySQL must be able to store the letters of your alphabet. Click on "Next".
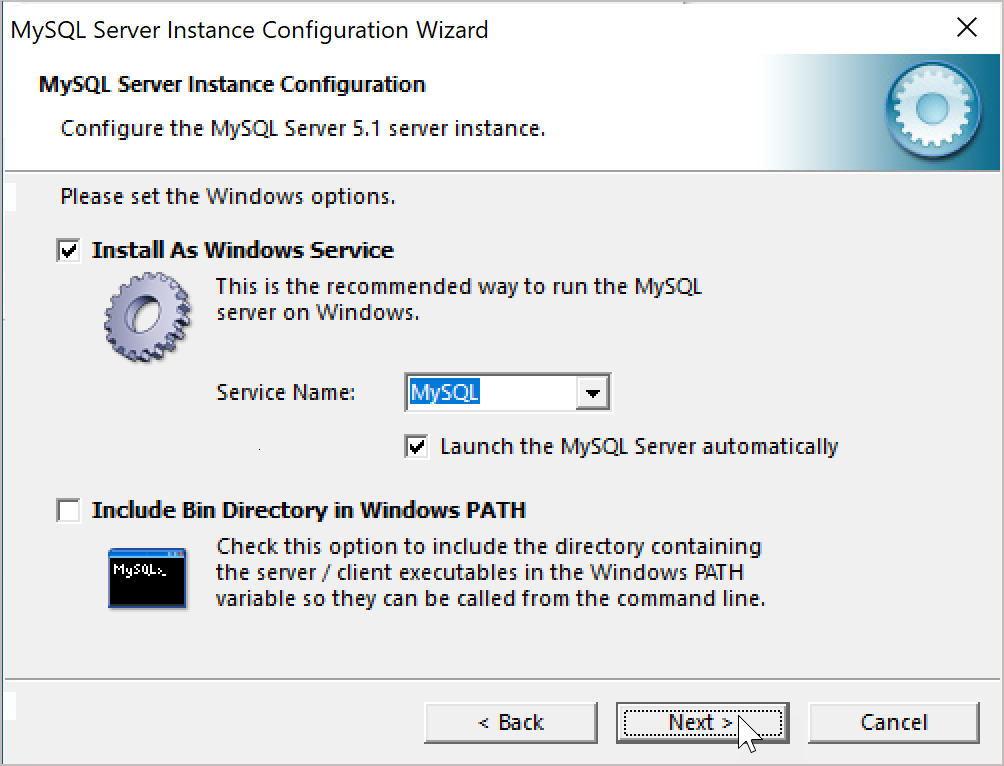
By default, the server will be started with the "Service Name" MySQL. This is also well arranged by default! Click on "Next.
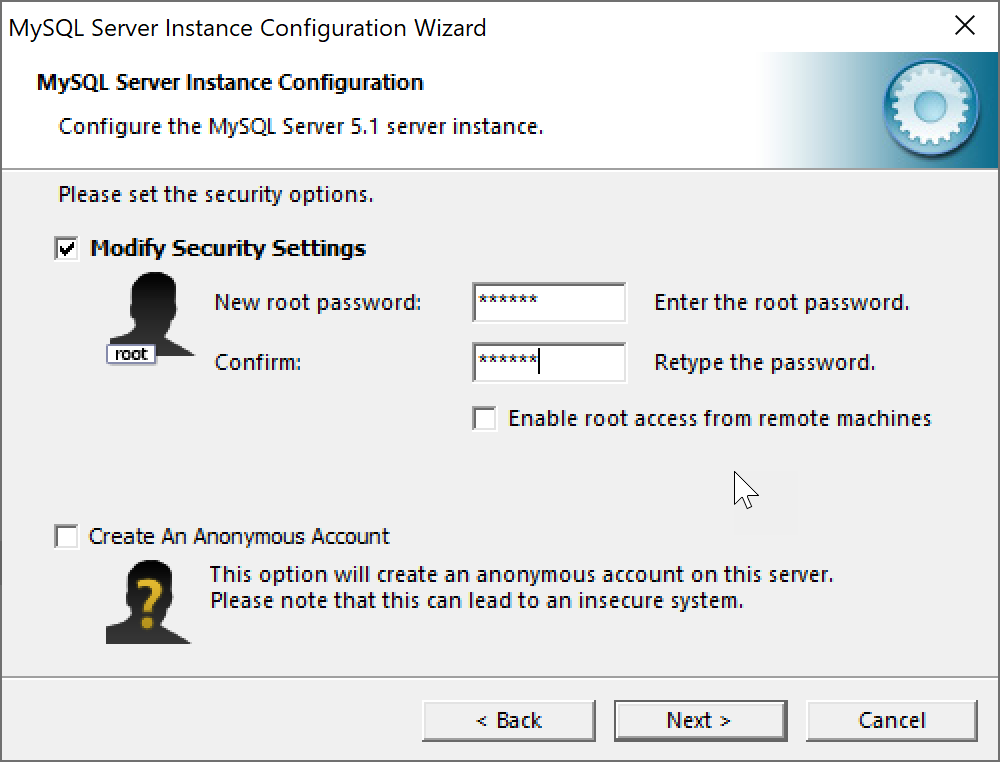
This step is important, because here we are recording the password for the database. During a first installation, the database does not yet have a "Current root password". So it remains empty. Enter the same password twice at "New root password" and at "Confirm". There is already enough talk about the complexity of a password. Don't make it too easy ("what's your dog's name") and don't make it too difficult ("what's the name of the neighbor's brother's dog"). Also write it down somewhere, because MusicManager© will set up a connection when the program is started for the first time - if MySQL Server and MySQL ODBC are present - which requires the name of the server and this password. So don't forget!
The wizard is now ready to configure MySQL Server with the settings made above. This is done in four steps:

Click on "Execute" to start this configuration.

We have four checkmarks, the installation is ready! MySQL Server has started and is now running invisibly as a "service" in your computer's memory. Click "Finish" to close the wizard.
